
This article covers the basics for how to start a profitable recipe blog especially if you’re a complete beginner.
There’s a reason food blogs are still one of the most reliably profitable niches in blogging — and it’s not just because everyone eats.
It’s because the traffic sources align almost perfectly.
What do I mean exactly?
Look at it this way:
- Google loves long-tail recipe searches.
- Pinterest was practically built for food photography.
- Ad RPMs in the food niche are consistently strong.
- Affiliate opportunities — ingredients, kitchen tools, meal kits — are woven naturally into the content itself. You’re not forcing monetization. It lives inside the post.
What’s changed in the 2026 food blogging stack?
A few years ago, the default pro-blogger advice was Foodie Pro + Genesis.
Nothing wrong with it, except it was expensive, a bit hectic for beginners, and overkill if you’re testing the food blogging niche before committing to it.
Now, there’s a leaner, faster, cheaper setup that gives you the same SEO and schema foundations without the upfront cost.
This post covers what’s available to beginner food bloggers.
Here’s exactly how I would build it. (Coincidentally, this is also the stack I used to build and successfully flip a niche food blog about culinary nutrition.)
Before you start building, consider this…
What type of recipe blogger are you?
Before you pick a niche angle, a theme, or a monetisation model — it’s worth spending five minutes on this: What type of food blogger are you? The NBL Blogger Persona Tool profiles four blogger types based on how you actually create — your energy, your content rhythm, your tolerance for SEO-heavy production. Most people build the wrong setup because they copy what works for someone with a completely different working style. Knowing your type first makes everything from theme selection to content planning significantly less wasteful.
Why Kadence + WP Delicious + Hostinger is the 2026 stack for profitable blog
Yes, Foodie Pro earned its reputation.
But, for those who remember, it came with a Genesis dependency, a learning curve, and a price tag that made people anxious before they published a single recipe.
In 2026, you can skip all that because things just got a lot lighter.
Here’s what I recommend:
The new default stack — Kadence (free) + WP Delicious (free) + Hostinger shared hosting — gives you:
- A lightweight, fast theme with proper starter templates
- Structured recipe cards with built-in schema markup (this is what gets you rich snippets in Google)
- A monetisation layer baked into the recipe plugin itself (no pun intended)
- Total startup costs that won’t make you wince
You’re not settling – you’re being strategic.
If you want to know more about the best WordPress themes with a comparisons, read this article below.
The 10-Step Blueprint for a Profitable Recipe Blog in 2026
Step 1: Decide your domain strategy
Do you want a new brand or a subfolder (a page on your existing blog or website) — be intentional about it.
What’s a standalone domain?
This is a dedicated website, and its address will be straightforward, like this example ‘healthykitchen.com’.
This model will give you a clean canvas and will be easier to flip as a single digital asset.
What’s a subfolder?
This is basically a single page (with code or script) that you add to your website’s public folder or make into a subdomain. It lives in the back-end of your site under the main domain. If you choose this route, you do not need to buy a domain.
Your content’s address will look something like this: yourblog.com/recipes.
This model is fine if you’re only testing the niche or your content before committing to a fully managed site.
*The rest of the article will follow on as if you’re setting up a brand new website.
Once you’ve decided on a standalone domain, register your domain directly in Hostinger (or your preferred domain registrar) and point it to a fresh WordPress install.
Step 2: Install WordPress via Hostinger
*If you’ve chosen a different domain registrar, simply replace Hostinger with that one in the instructions that follow.
Hostinger makes it easy with its one-click install from your dashboard.
Select in this order:
- Hosting → Website → Install WordPress
- Set your site title and admin email (you can change this later if necessary)
- Log in at yoursite.com/wp-admin or directly from hpanel
And that’s done in under five minutes.

Recipe Sites – Best WordPress themes for 2026
Step 3: Install the Kadence theme
Inside WordPress, go to:
- Appearance
- Select Themes → Add New → search “Kadence” → Install and Activate. After that, install the Kadence Starter Templates plugin. These are readymade templates – you get a usable design without starting from a blank page.
Step 4: Import a food blog starter template
Inside Kadence, go to:
- Starter Templates. Choose any food or recipe-style layout.
- Import it. Now replace the placeholder content with:
- your logo, your colours, your navigation.
Note: If the import stalls, go into Hostinger and temporarily set your CDN security level to “Essentially off”, then retry.
You now have a branded, real-looking site within ten minutes of starting this step.
Step 5: Install WP Delicious
Inside WP Delicious, go to:
- Plugins
- Select Add New → search “Delicious Recipes” → Install and Activate.
- In the plugin settings:
- set your recipe slug (I use ‘/recipes’)
- set a default image size
- Check that schema markup is switched on
What is schema markup for?
Every recipe you publish from here will include structured data, which tells Google how to display your content as a rich result.
TIP: Site and content structure are more important than ever for SEO. Use every opportunity to give clarity to your content through structure – think:
- subheadings,
- breadcrumbs,
- permalinks,
- slugs,
- categories,
- and most importantly, coherence – it needs to make sense to search engines
Content clarity will increase your chances of ranking and getting cited in AI. Intentional structure builds authority, and authority is what AI looks for when culling data for another user.
Step 6: Add your affiliate link inside the plugin
This is the part most people skip, which is exactly why you shouldn’t.
In Delicious Recipes:
Go to:
- Settings → Monetization → Affiliates
- Next, enable “Display Powered By.”
- Paste your WP Delicious affiliate link into the field – this adds a small CTA at the bottom of every recipe card pointing to your affiliate URL – making this a passive income from your tech stack, running from day one.
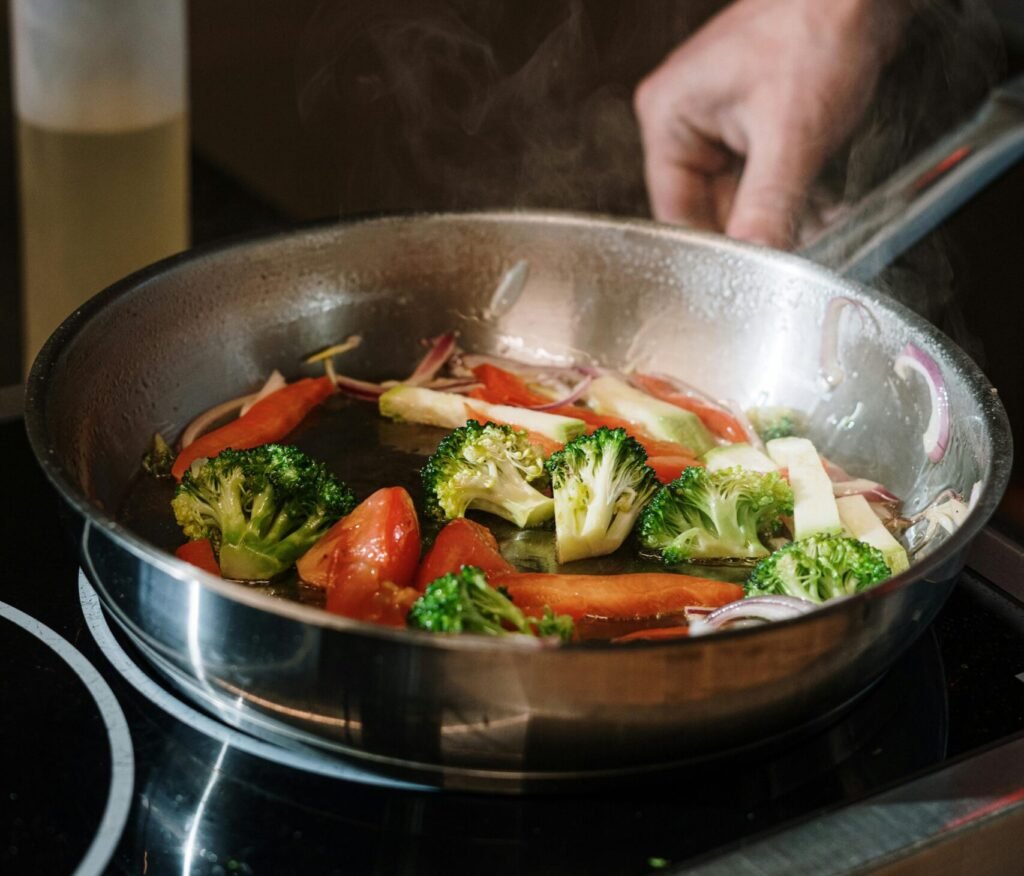
Stovetop meals – 10 easy and affordable recipes with ingredient lists
Step 7: Write your first recipe
- Inside WP Delicious, add a new recipe and add data to—
- title
- description
- ingredients
- method
- prep time
- cook time
- difficulty (label as easy, beginner, intermediate, expert, or advanced)
- main image (make sure it has appetite appeal, even if you’ve taken it with a phone camera; make the image vertical and high quality so it does double duty as a Pinterest pin (content marketing)
Don’t skip any of these seemingly mundane details. Specifics add to search optimisation. Giving the user details that will enhance their experience builds trust with them.
Start with recipes that have real search demand and are easily identifiable. For example, aim for targeted titles such as “easy 30-minute vegan dinners,” “budget keto breakfasts,” that kind of territory. These types of recipes are low competition but have high intent.
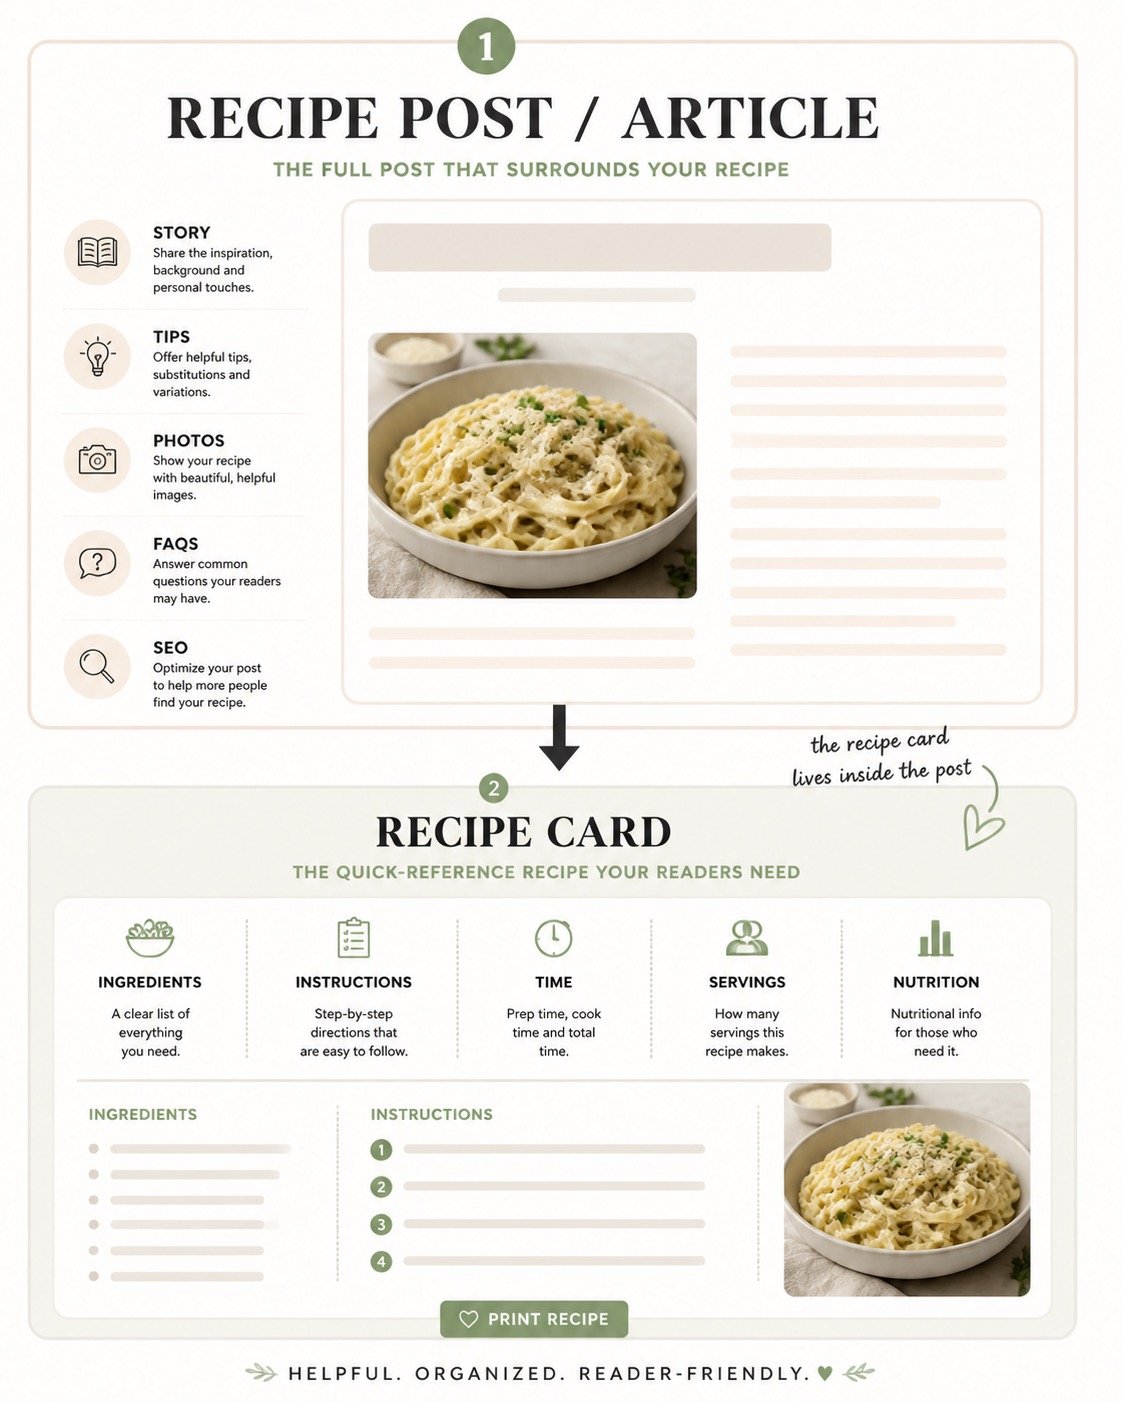
Recipe post vs recipe card – what’s the difference?
Have you ever wondered if you need both? Here’s an explanation.
What you need to know
| Aspect | Recipe post / article | Recipe card |
|---|---|---|
| What it is | The full blog post that lives at its own URL and can include story, tips, photos, FAQs, and the card itself. | A structured block inside the post that holds the core recipe details in a compact layout. |
| Main purpose | Tell the story around the recipe, answer reader questions, build trust, and give context for search engines. | Make the recipe easy to read, follow, print, save, and show clearly to search engines as a “recipe.” |
| Typical content | Intro, who it’s for, when to serve it, key tips, substitutions, step‑by‑step process shots, troubleshooting, storage, internal links. | Title, image, ingredients, step‑by‑step instructions, prep/cook time, yield, notes, sometimes nutrition and ratings. |
| Length | Can be long-form: multiple sections, headings, and images. | Short and scannable: just what someone needs to cook or bake. |
| Reader behavior | Great for readers who want explanations, tips, and process photos before committing to the recipe. | Ideal for “just give me the recipe” readers who scroll or jump straight to the card. |
| Where it lives | Its own blog post in your CMS (e.g., a WordPress post) that you promote, link to, and share. | Embedded inside that post, usually added via a plugin or block and not meant to stand alone. |
Optimisation
| Aspect | Recipe post / article | Recipe card |
|---|---|---|
| SEO role | Targets keywords, supports topical authority, adds helpful content and internal links around the recipe topic. | Provides structured data (schema) so Google, Pinterest, etc. recognize it as a recipe and can show rich results (ratings, times, image). |
| Design & layout | Flexible layout: you design sections, image placement, and story flow any way you like. | Pre‑designed layout with consistent typography and fields so every recipe looks and behaves the same. |
| Printing & saving | The full post is rarely printed because it’s long and includes lots of extra content. | Often has a dedicated “Print” button and clean layout designed specifically for printing and saving. |
| Editing workflow | You edit like a normal article: text, headings, images, links, SEO settings. | You fill in fields (title, ingredients, steps, times, etc.) in a form/interface, and the card is generated for you. |
| Reusability | Harder to reuse as-is; each post is written for a specific angle or keyword. | Easier to reuse, clone, or update globally (e.g., adjust nutrition or timings across multiple posts if your tool supports it). |
| How beginners should think of it | “This is my full ‘meets the reader where they are’ article about a dish.” | “This is the clean, structured recipe box at the heart of that article.” |
Sources
How to Write a Recipe Post – Feast Design Co.feastdesignco
How to Write a Recipe Blog Post: A Complete Guide – Bootstrapped Venturesfoodbloggerpro
What Is a Recipe Card? Definition, Types, Uses – Template.nettemplate
The Right Way to Categorize Your Recipe Posts – Food Blogger Profoodbloggerpro
Food blogger seeking advice on how to format WordPress website – Redditreddit
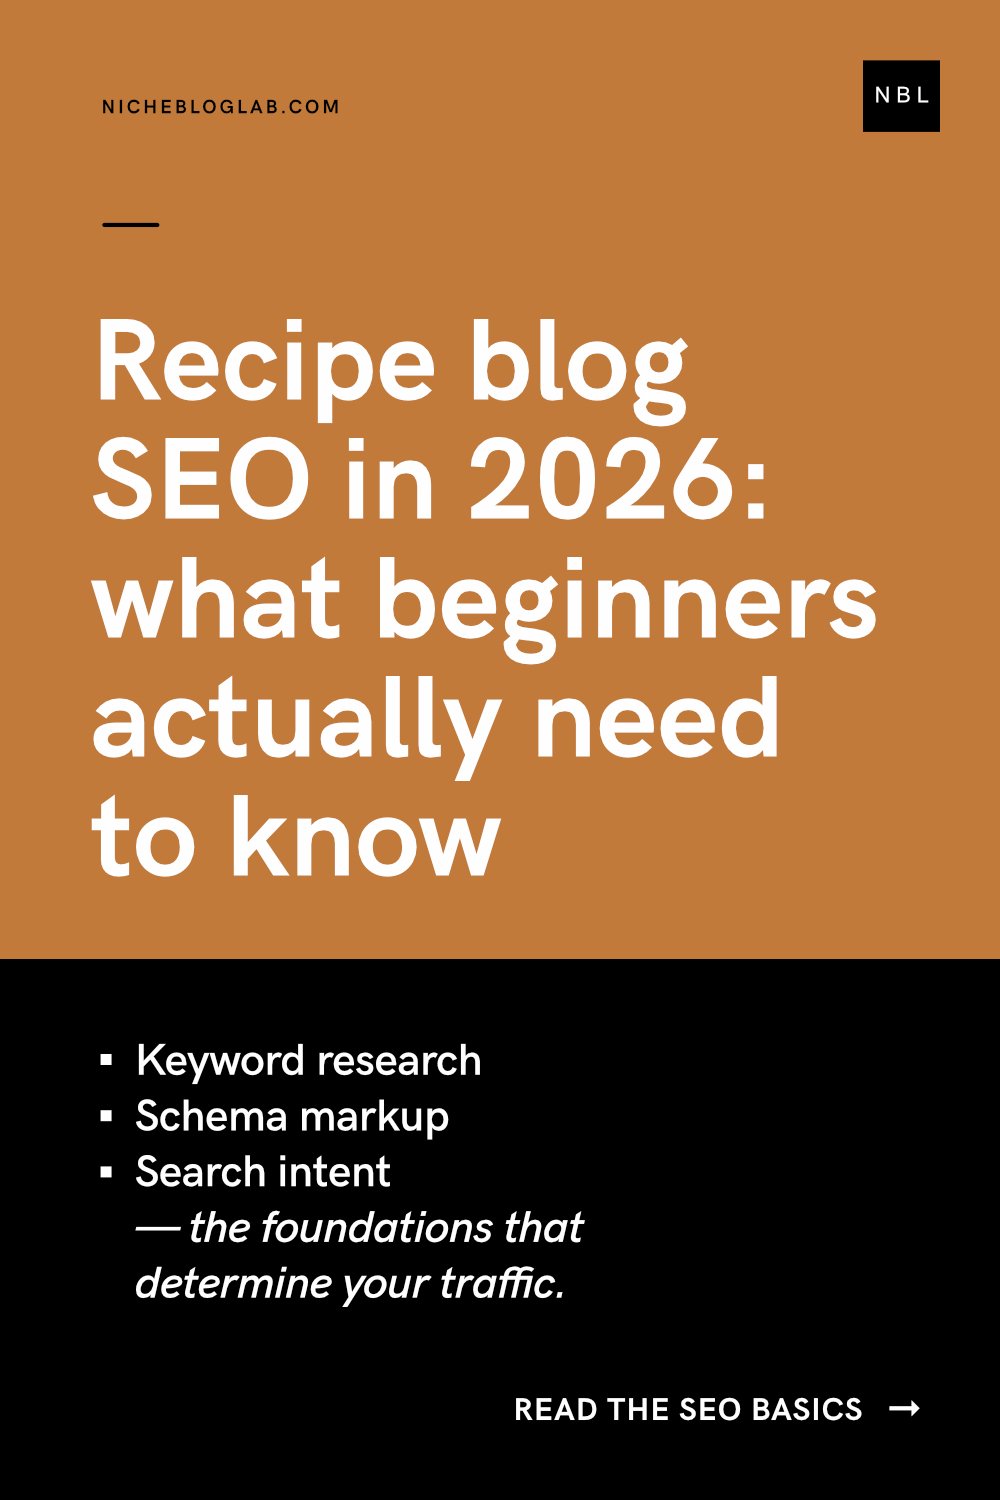
Step 8: Optimise for Google and Pinterest
For search engine optimization, do the following:
Install Rank Math, AIOSEO, or Yoast (currently used on NBL). Use it inside a post to insert meta titles and descriptions — the schema side is already handled by WP Delicious, so you’re not doubling up, just layering.
TIP: Yoast has a free SEO training for beginners course (unsponsored).
Something worth thinking about strategically:
Don’t skip meta titles and descriptions – it’s important for how your site shows up in search – be sure to hook the user as they’re scrolling for the right link to click.
If your user doesn’t see immediately what your site is about or how it can help them, you lose them. Think of it as if you’re leaving money on the table when selling digital products on your site.
For content marketing consider this:
Aside from being visually inspiring, Pinterest pins serve one main purpose – to market your content.
Populating your post with tons of pins can be a distraction when your recipe content is the highlight of the article.
Here’s a solution: When you have lots of pins (that you want repinned by other users), bury them inside the article so they’re unseen. How? By selecting the hide feature for each pin after you’ve placed them.
How to hide optimised Pinterest pins inside your article without it distracting from your main content:
Go to:
- Click the ‘+’ icon inside the WP post editing mode
- Select Image (top left)
- Upload your pin graphic
- Align it as you wish
- Attach a link to it if necessary
- Now, select your image(pin) so that the little block toolbar pops up again
- Click the three dots in the top right corner of this bar – it will release a drop-down menu
- In this drop-down menu, scroll down and select Hide
- Watch the pin disappear (don’t worry, it’s still there)
- Save your draft
- Click Preview to load the post.
- Now click the Share icon in the top-right of the browser bar
- Select Pinterest
- A new window will pop up – can you spot your hidden pin?
- Select as many pins as you want
- Select a board and click Save
- You’re done!
How to add a Pinterest pin button to your images with Weblizar Pin It Button:
Go to:
- WordPress dashboard–Plugins
- Click Add Plugin
- In the search, copy and paste this: Weblizar Pin It Button On Image Hover And Post
- Install and Activate
- The PinIt plugin will appear in your WP panel on the left
- Select your preferred settings
TIP: Why is a ‘Pin It’ button important on a recipe site?
Recipes are the most pinnable visual content on Pinterest. Your objective is to market your content, so you need to use every asset on your site to double up as marketing. displaying pins inside posts and pages, makes it easy for a user to pin your recipe content. this allows you, the creator, to do less marketing ‘lift’ so you can focus on writing more posts.
When optimising for Pinterest, use an optimised format and make your images 1000×1500px.
Exploit your board titles and descriptions as well – it should be keyword-rich and strategic, not ‘clever’. Pinterest is a search engine. Treat it like one.
The resources below will help you get started on your Pinterest content marketing journey.
Get the Pinterest Pin Design Spec Sheet for Bloggers here.
A resource for designers and non-designers: 10 Pin Templates That Actually Get Clicks
10 Pin Templates That Actually Get Clicks
Related reading:
Canva Pinterest Pin Template: 5 Design Features That Actually Drive Clicks
Pinterest Pin Templates: 10 Proven Formats That Get Clicks (With Canva Examples)
Pinterest Pin Design Tutorial – How to create your first one, in Canva, step-by-step
Step 9: Build in monetisation from the start
You don’t need traffic to set this up — you need a plan.
- Display ads: Start with Google AdSense and upgrade to a premium network (Mediavine, Raptive) once you hit their thresholds.
- Related reading: Grow by Mediavine: Why I’m Thinking Twice About Using It on My Blog
- Affiliate links: Ingredient links via Amazon, kitchen tool recommendations inside posts. The content earns while it’s indexed.
- Email capture: A simple lead magnet — “Free Weekly Recipe Pack,” a meal plan PDF, a shopping list template — captures readers before they leave. Use MailerLite or Kit.
Related reading: Niche recipe inspiration
Step 10: Grow the library, then decide
Aim for 10–20 evergreen recipes with solid SEO foundations before you start worrying about more content and pinnable pins.
See the first 10-20 recipes as critical mass. Once that first surge is done, the blog will start to take shape, as well as your editorial voice.
Then look at your data (not before): spot where the traffic is coming from, what’s converting, and what’s not.
If the site is performing well (hundreds to thousands of views or sessions, not ‘tens’), you’ve got two directions — scale it, or package it and flip it.
Either way, you built something real.
Food blogging – the niche economics, briefly
This type of blog traffic compounds.
What does that mean?
A well-optimised recipe from 2025 can still send you Google and Pinterest visitors in 2028. The content is evergreen by nature – remember this when creating your recipe. Ad RPMs in the food category are among the strongest in lifestyle publishing.
The new monetisation – one that you own
Digital products are guaranteed profit and a production chain you can sustain – especially if you’re AI-assisted.
What type of products can a food blogger sell on the blog?
- a meal plan series
- a themed cookbook PDF
- a paid recipe vault
These are just a few examples. You’ll already have the email list and the audience to sell to. That’s what compounding traffic will do for you.

Before you build, know what you’re building.
Digital products work best when the niche is specific enough to attract a loyal, recurring audience — not just search traffic. The Stovetop Meals Niche Concept Blueprint maps one focused niche as a complete content business: who the audience is, what content pillars to build around, and exactly how to monetise it.
One niche. One PDF – fully mapped.

No subscription. No guesswork.
Not sure about this niche? Validate another idea – free at nicheideavalidator.com
Conclusion: What to do next with your profitable food blog
If you’re starting from scratch, do this:
- Pick a domain this week
- Install WordPress
- Install and activate Kadence
- Publish one recipe before the weekend
Just do one to prove to yourself that the workflow works.
The alternative: Subdomains and HTML pages
If you don’t want to buy a new domain, you can host a separate html page just for recipes on your existing WordPress site.
Go to:
- Hostinger > Websites > Dashboard > Domain
- Click on ‘Subdomain’
- Give your Subdomain a name
- Click ‘Create’
- Now drag / copy your custom HTML-coded or JS-scripted pages into this folder
- Remember that these pages will always have a .html address. Not as ‘clean’ as a standalone domain.
If you already have a WordPress site and you’re considering adding a recipe section: install WP Delicious, set up the affiliate link, and add five recipes as a test cluster. See what the data tells you in 60 days. WordPress blogging is not a quick-income hack. You need to be in it for the long haul. The rewards are there; that’s not a fallacy. But you need to be patient and persistent.
The hardest part of building a niche site, even a small one, is not the tech. It’s publishing that first post when no one’s watching yet. If you can get over that little hurdle, you’re on your way.
Want the checklist?
Want the exact 10 Steps to a Profitable Recipe Blog checklist I also use when setting up a new recipe blog on Hostinger? Drop your email below to get it delivered to your inbox.
Ready to invest in hosting?
For your hosting: Ready to build a recipe site with WordPress or a fast AI-build? Get 20% off hosting with Hostinger. It’s what I run my own sites on, and it’s the first thing I recommend to anyone starting a niche project. Grab the discount here.
Ready to build your first recipe cards withWP Delicious?
For building revenue with your recipes: Once you’ve installed your site and customised your header and top nav, write your first recipe post. Don’t be nervous. Just keep the recipe simple and helpful.
Once you’re done, sign up with WP Delicious’s affiliate program and let your very first recipe post earn for you.
Ready to start tracking keywords?
For keyword tracking: Once your site is live, tracking the right keywords is what separates guesswork from strategy.
I used this keyword tracking tool to build — and successfully flip — a food and nutrition blog with only five tracked keywords. Focused, intentional, and it worked. Start tracking yours here.
Still unsure about your food niche?
Work with me to uncover your ideal niche – I use real-time search intent research so you don’t waste time guessing.
Or perhaps you need to know what type of niche suits your blogging energy – in that case, start here.
If you found this article helpful, you’ll want to read this one too.
Subscribe below to receive the lab updates.
Disclosure: While this publication uses AI tools for data collection and analysis support, the research questions, hypotheses, and core insights are the human author’s original work. AI assists with information processing, but all conceptual thinking, interpretation, and conclusions reflect the human editor and writer’s professional expertise. NBL may receive a commission from some referral links mentioned in this article.


